Traditional film photography is a specialism of its own. Whilst digital cameras are more readily available in this modern age, the art of processing film and darkroom photography is still a practice that can produce some the most creative and unique of print.
If you’re curious about how to process black and white film in a darkroom, we’ve put together a handy guide to walk you through the steps without all the unnecessary technical jargon!
What You Need:
Before we dive into the process, here’s a quick list of the tools you’ll need to develop your film:
- Red/orange safelight
- Enlarger (with 50mm lens if printing 35mm film)
- Film negatives
- Photography paper (Ilford Multigrade papers are commonly used)
- Four trays/dishes large enough for your print paper
- Measuring jugs
- Developer, stop bath, and fixer chemicals
- Thermometer
- Squeegee or Sponge
- Running water (or a sink)
- Clothesline and clips (for drying)
- Timer
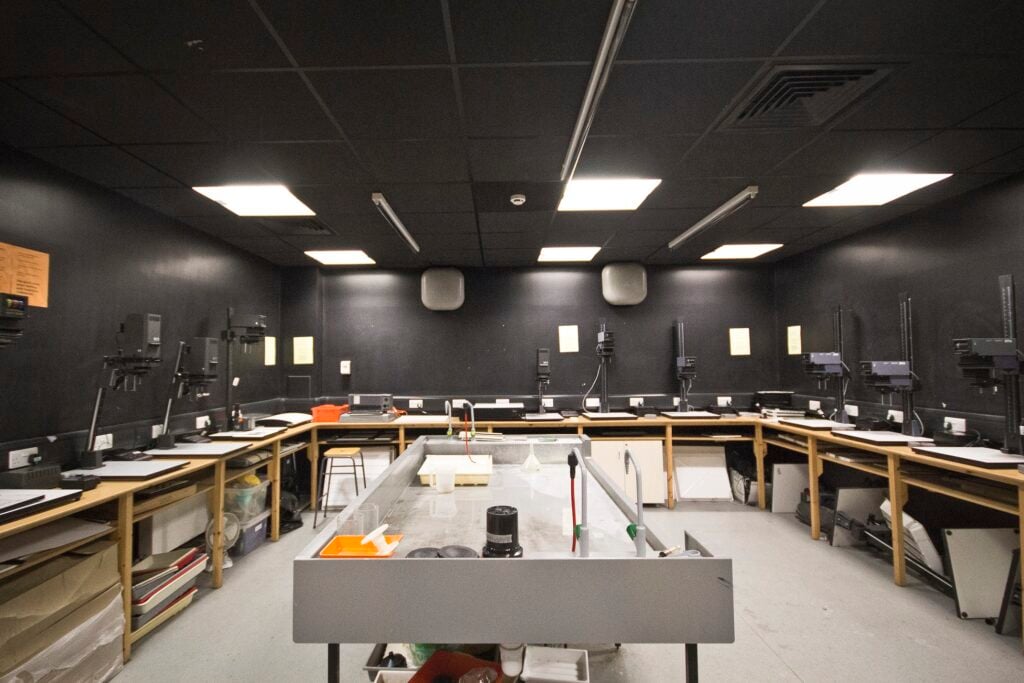
Step 1: Set up your space
It’s no secret that film needs to process in darkness, so you’ll need access to a photography darkroom.
It is possible to use a normal room if you can guarantee all stray light can be blocked out sufficiently. Remember, if you can still see across the room with the lights turned off, then it is still too light.
Firstly, you will need to turn on the safelight and lay out three processing trays/dishes, labelling them DEV, STOP and FIX, two pairs of print tongs, and a clock for timing.
Your trays should be big enough to lay your largest sheet of paper comfortably.
Step 2: Mix your Chemicals
Now your space is ready, it’s time to prepare the chemicals. You’ll use three main ones:
- Developer
- Stop bath
- Fixer
Follow the instructions on the bottles to mix them with the right amount of water. Be sure to keep an eye on the temperature – ideally, you want it around 20°C for most films.
Your chemicals are now ready to be placed into their respective trays. The developer should be nearest to the enlarger, then the stop bath and then the fixer. Beyond that should be a tray or bucket of water for washing your print.
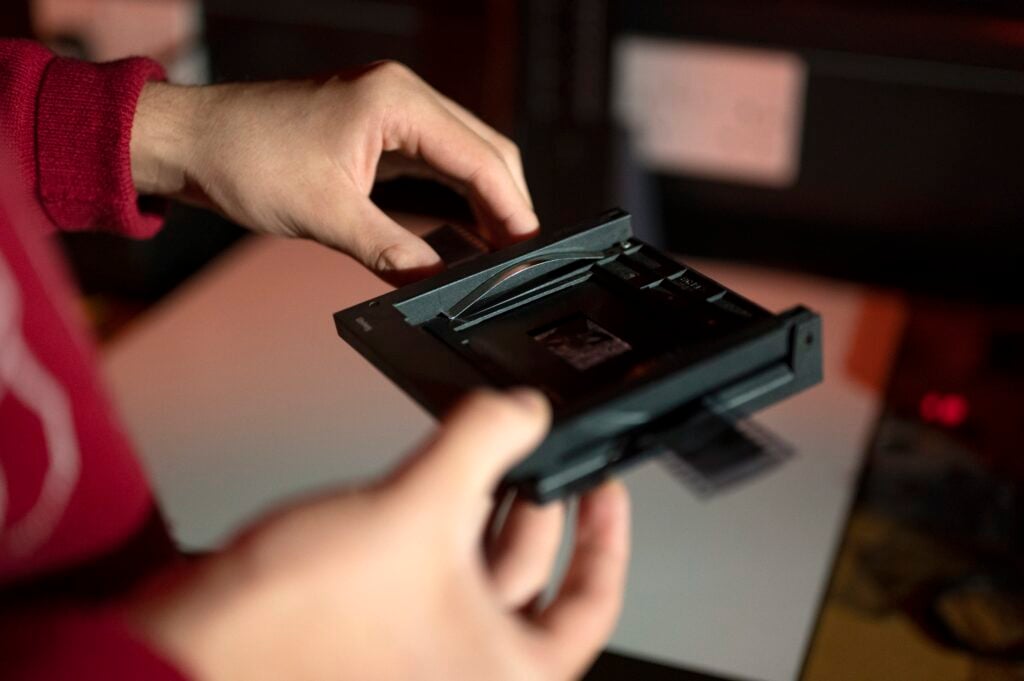
Step 3: Place your Negative in the Enlarge
Once the chemicals have been measured out, place your negative in the enlarger carrier with the shiny side upwards and the numbers away from you. Set the enlarger at the correct height to give a projected image big enough for the chosen print size. Each time you alter the height, refocus the image.
Turn on the enlarger, altering the aperture ring until the brightest image is projected onto the baseboard and focusing the image on the masking frame. Turn the lens’s aperture ring until you feel two clicks and see a slight darkening of the projected image. This should be two stops darker than the lens’s maximum aperture.
Step 4: Expose the Film
Place a Grade 2 filter into the enlarger, then place your paper on the masking frame (cut to size if necessary). Expose for the appropriate time (see top tip below for more information). Make sure you do not move the paper as you move the card.
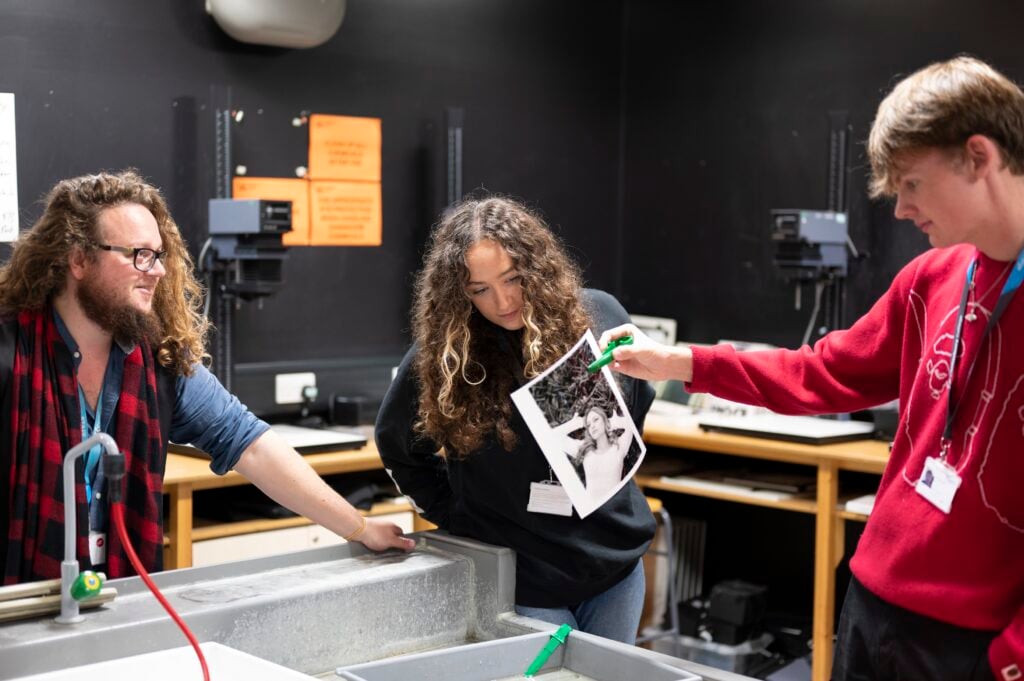
Step 5: Develop your Print
Place your photo paper into the first tray, submerging it into the developer completely. Rock the tray, or simply swirl the mixture to keep the chemicals flowing evenly. After 50 seconds, use tongs to lift the paper out, and drain off the developer
You will begin to see the print forming on the paper within seconds – don’t be fooled into removing it from the mixture too soon.
Step 6: Stop the Developing
Next comes the stop bath which stops the developing process. Place the paper into the STOP tray, rocking/swirling the mixture gently once again. You only need to leave it in for about 30 seconds.

Step 7 Fix the Print
Now, take care in moving your paper to the final tray which should contain your fixer solution. This makes the image on your film permanent, so it won’t fade or change when exposed to light.
Once again, rock the tray or swirl the liquid to get a good flow of chemicals over the surface of the print. Fixing should only take 30 seconds in a fresh solution. It shouldn’t matter if this time is exceeded slightly, but prints should not be left in the fixer for minutes on end.
It is now safe to turn the lights back.
Step 8: Rinse with Water
After fixing, you need to rinse the film to remove any leftover chemicals.
Move your print into a fourth tray, this time washing the print for two minutes in a good flow of water, ideally at about 20°C. Empty the wash tray a few times to ensure a complete change of wash water, and to make sure the water reaches every part of the film.
Step 9: Hang to Dry
Now it’s time to drain and dry your print. Use a squeegee or sponge to remove any excess water, and then clip the print onto a clothesline or hanger over a drip tray to dry.
You can speed up drying by using a hairdryer on a low setting, kept moving and about 30cm/1ft away from the print.
Most common photographic paper will dry in under 30 minutes if they’re hung in a warm room.
Step 10: Examine your Final Print
Once dry, it’s time to enjoy the artwork you have created.
If you notice the image does not have a full range of tones you may need to adjust your exposure time or check you followed the instructions correctly (especially step 5).
TOP TIP
It’s best to process a test print first, to gauge exposure times. With the safelight on and the room lights off, expose a sheet of photography paper to the enlarger lamp for two seconds. Cover one-quarter of the sheet with opaque card, and expose the rest for another two seconds. Then cover half of it, and expose the rest for another four seconds. Cover three-quarters and expose the last part for another eight seconds. This will give you a guide to the perfect exposure needed for the image.
Once developed, one strip of the print should look just about right, this will indicate the exposure time needed for the real print. If one strip is too dark and the next too light, the right exposure will be somewhere in between. And if all the strips are too light, open up the aperture by two stops and repeat the test. If they are all too dark, close it by one stop and repeat the test.
Interested in learning more?
Consider applying for one of our Creative and Design courses to become proficient in the art of darkroom photography.
More articles

EKC Canterbury College launches Wellbeing Garden
How studying Public Services can help you land your dream job